Effects and quality assurance
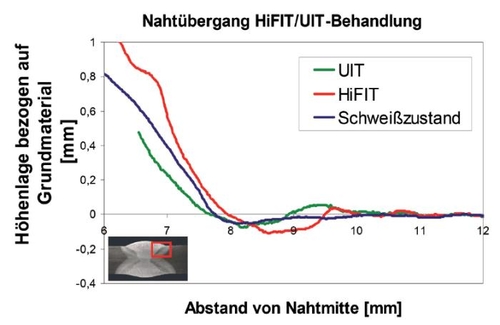
Edge-layer effects of treatmentGeometry:The high-frequency hammering methods cause plastifications at the weld transition. Those lead to a corner arc of the weld transition and therefore to a reduction of the sharpness of grooves. The analysis of the pins’ diameters shows, that the weld transition is shaped according to the pins’ shapes. Small diameters generate deep dents, which are connected with bulging at the edges. Pin radii between 3 to 4mm generate optimum transitions. The HiFIT method creates a flat groove. The UIT method creates single dents which implicate flaring close to the surface.
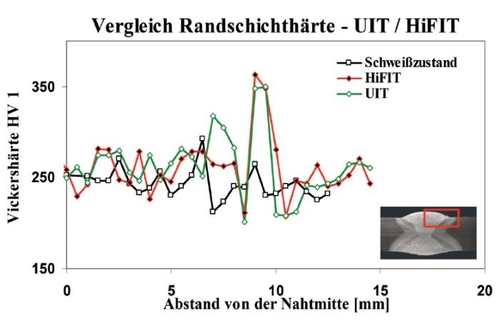
Edge layer strength:Both high frequency hammering methods create a significant increase of edge layer strength. Measurements after HiFIT treatment showed a Vickers Hardness increase HV1 from 250 to 350. Measurements after UIT treatment show comparable results.
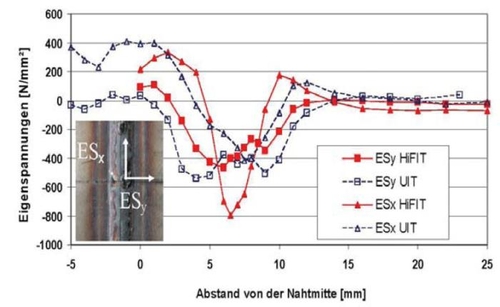
Residual stresses:Measurements of residual stresses close to surface show that both methods create high local residual stresses to the base material’s elastic limit. By complementary depth measurement, the treatment parameters’ influence, like the operating pressure and pin diameter, depth distribution and the maximum values of residual stresses close to surface are lower. With optimum parameters, almost constant residual stresses could be detected for a depth of up to 0,8mm after HiFIT or UIT treatment. Due to the measuring methods’ limits, the measurements were limited to depths of 1,2mm.
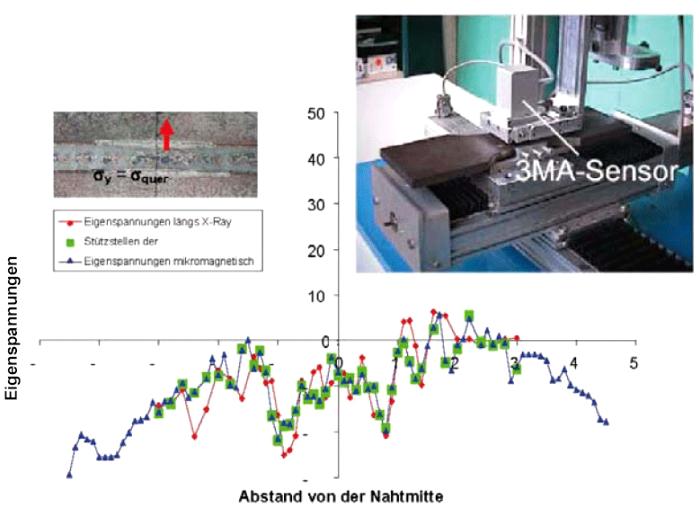
Quality assurance:Quality assurance is an essential prerequisite to allow the use of after treatment methods in praxis. Within the scope of this project, micromagnetic methods will be enhanced to check the change of hardening of edge layers due to after treatment methods. The low effort as well as the short measuring periods compared to other methods, which are in the time scale of seconds, are advantageous. With a multiparameter regression of magnetic measurements, the generated close to surface beam hardenings and residual stresses can be quantified and the compliance of minimum values can be checked. By variation of measurement parameters a depth disbandment shall be realized, so that non destructive edged-layer analyses will be possible.
|


